From this tutorial, you will learn about how to install or flash Tasmota on Wemos esp so it can turn on and off a relay. And then connect this device in smartnest website for you to be able to control it online for free.
You will need the following:
- Wemos and a wemos relay module
- Tasmota firmware 8.1.0 and esptool
- Arduino app
Installing Tasmota on Wemos
First, connect your wemos on your computer and open the arduino app.
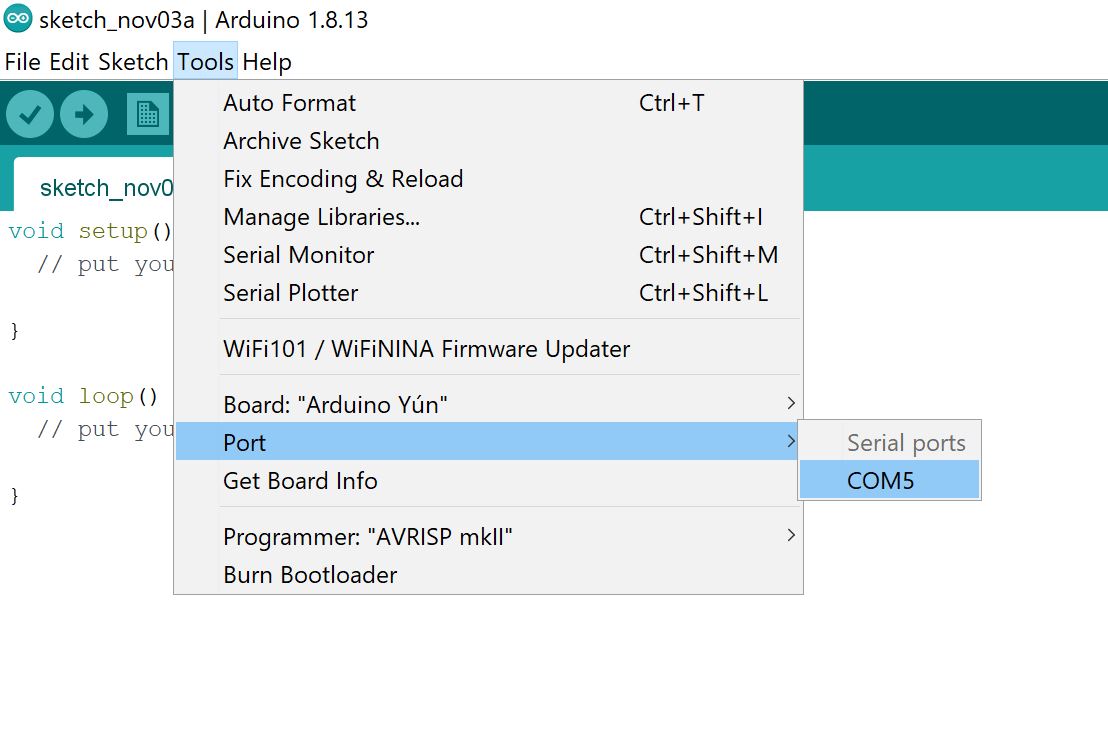
From the menu of arduino app, click Tools and check the Port. On my computer, I see COM5
Now download the Tasmota and esptool here: [Click here to download]. I do not own these files, I just downloaded it long time ago from tasmota dev website. Unzip it after the download.
Run flash_tasmota_8.1.0.bat file. Type the port number (5) you saw on arduino app and press Enter.
If there is no error, you should see it flashing.
Once it’s finished, remove wemos on your computer.
Configure Wemos Tasmota
Connect wemos on your computer and open Arduino app.
From the menu, click Tools >> Port and select the port number of your wemos. Usually you can see only one port there.
Again click Tools, and click Serial Monitor.
2 Ways to connect Wemos on your wifi network
- WifiManager
- Command line.
Connect to wifi using WifiManager
While Serial monitor window is open, type reset 1. It should activate WifiManager. On your windows network, you should see a new wifi named tasmota-xxxx
Connect on that ssid and open your browser and type this address: 192.168.4.1

From there you can enter your home network wifi details. If correctly done, wemos will connect in your network. Go back on Arduino app and you should see wemos connected and IP address should display. On my computer, it display 192.168.10.21
Connect to wifi using Command line
On Serial monitor window, type ssid [your wifi name]
And then type password [your wifi password]
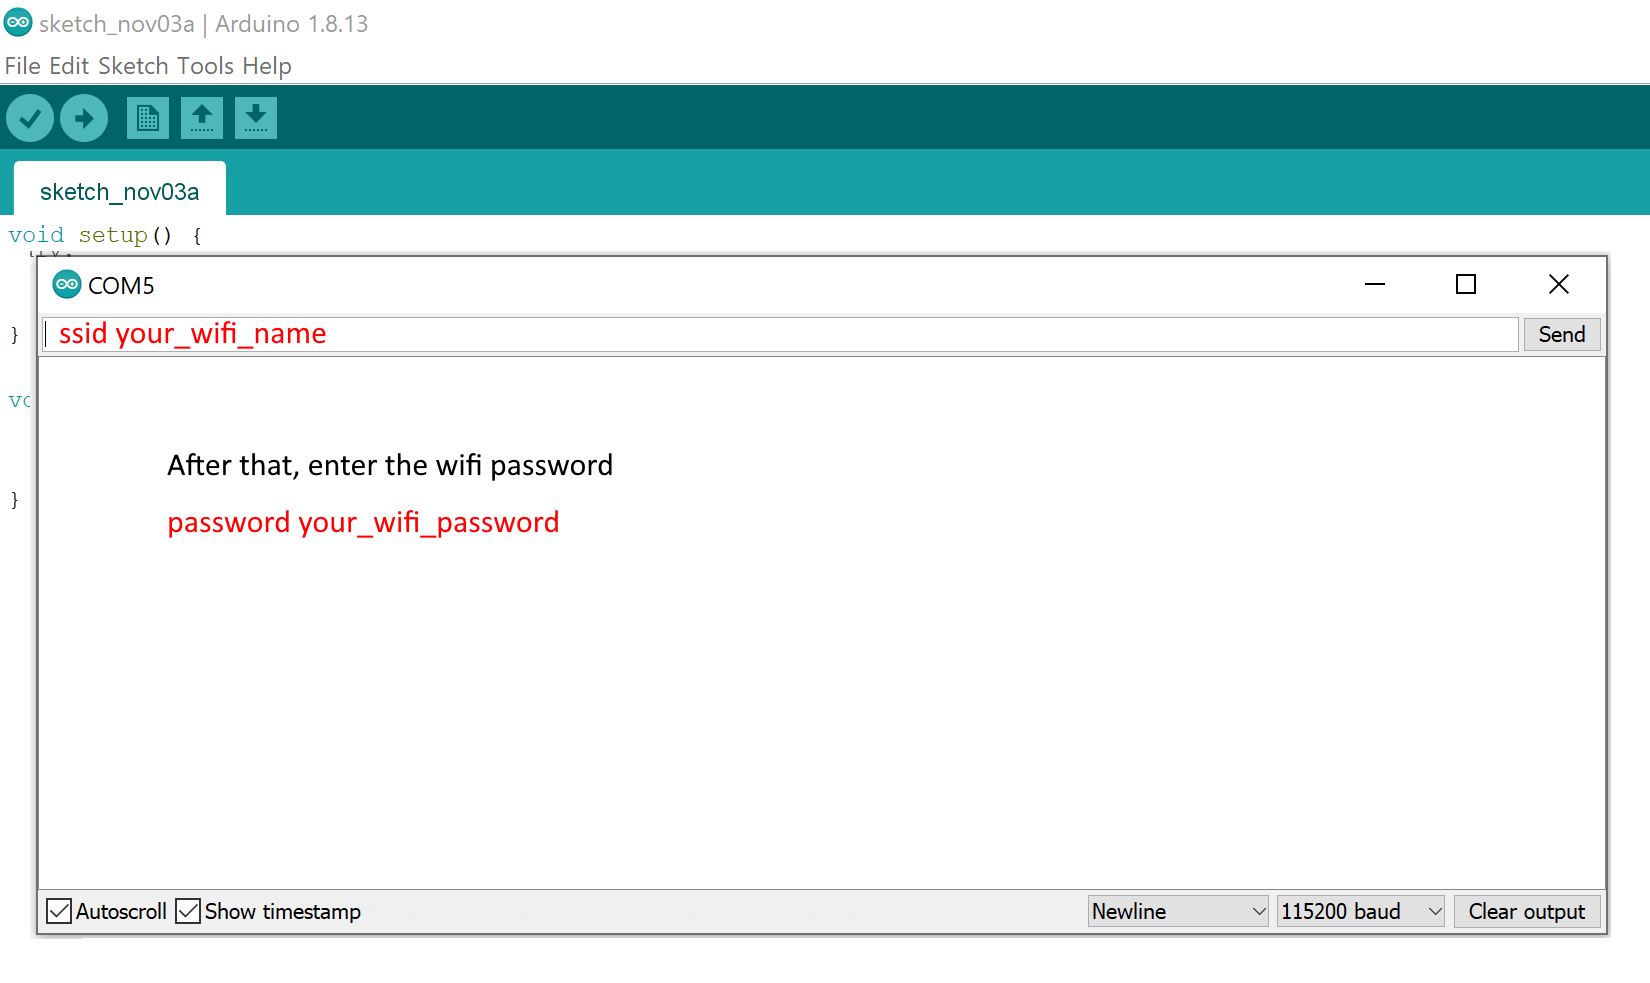
It should connect in your network and you should see a new IP address.
Configure Tasmota Module
On your web browser, enter the IP address as URL address. It should open the Tasmota web interface.

Click Configuration >> Configure Module and click Module type drop-down box. Go to the bottom and select Generic 18 and click Save.
Again go back to Module type and select the right pin for the relay. Because I’m using wemos relay, I will use D1 (GPI05) and assign Relay 1 (21). This will send positive signal on D1 activating the relay to turn on.
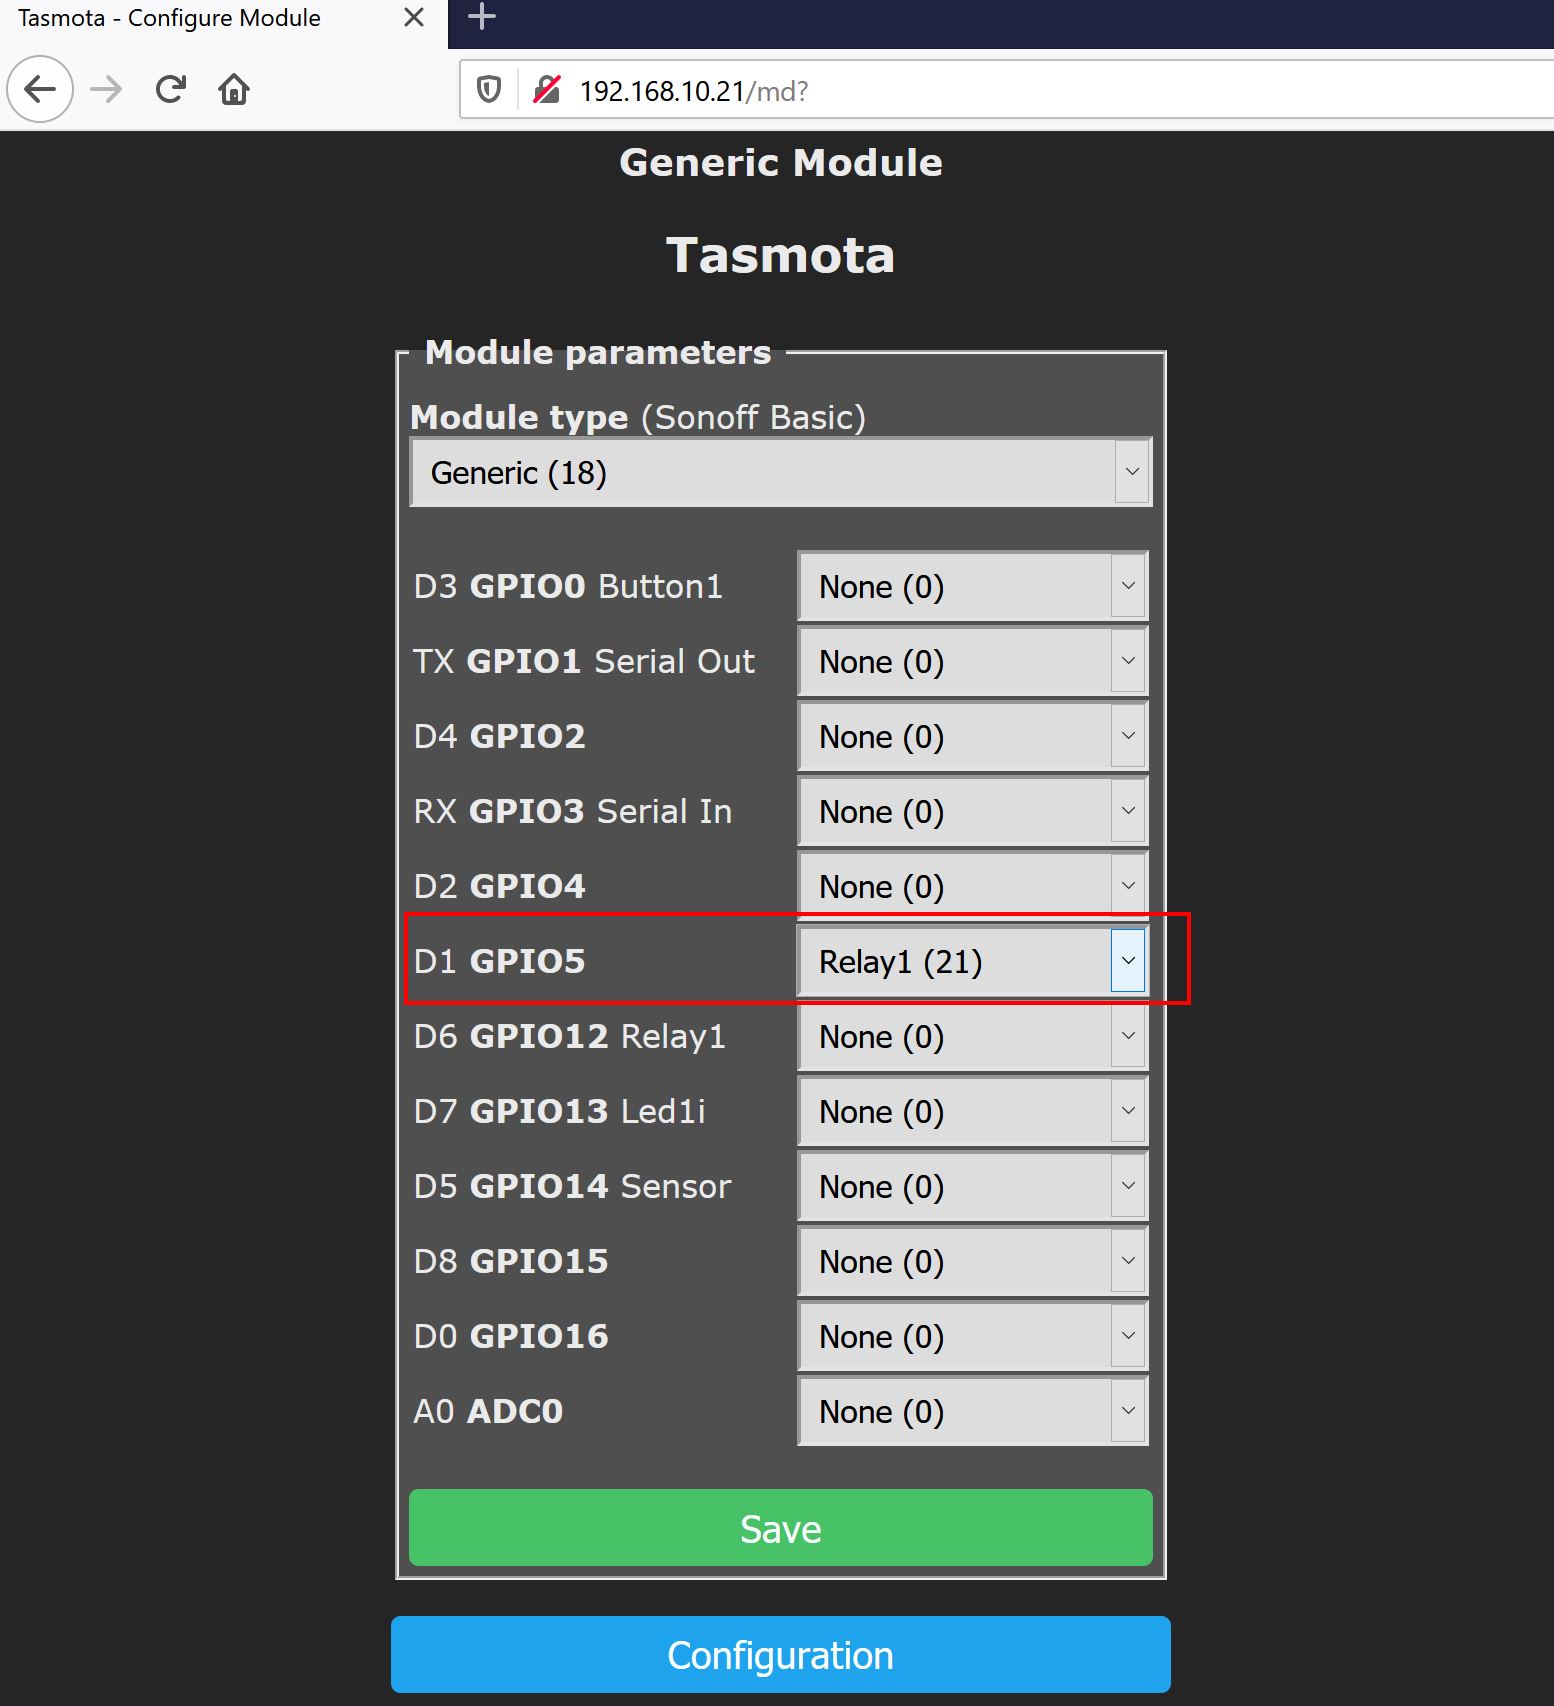
Click save. You should be able to turn on and off the wemos relay.
Integrate Tasmota on Smarnest
To control the device anywhere online, you need to configure the tasmota MQTT.
First, you need to register to smartnest and login.
Go to My devices and add new device. Enter a name and use Switch type.
Once added, click View and get the ID. (Device ID)
Now get the API Key from My account.
Device ID and API key are all we need to configure the MQTT of tasmota
Back on your browser on Tasmota web interface home, click Configuration >> Configure MQTT and enter the following details:
Host: smartnest.cz
Port: 1883
Client: [Device ID]
User: [Your Smartnest username]
Password: [API Key]
Topic: [Device ID]
Full Topic: %topic%/%prefix%/
Please notice Full Topic is not the same as the default value. Change it accordingly.
Save the changes and now click Console.
From console, you should see logs. If you see MQTT is connected, it means you done it right.
Control Wemos online by Smarnest
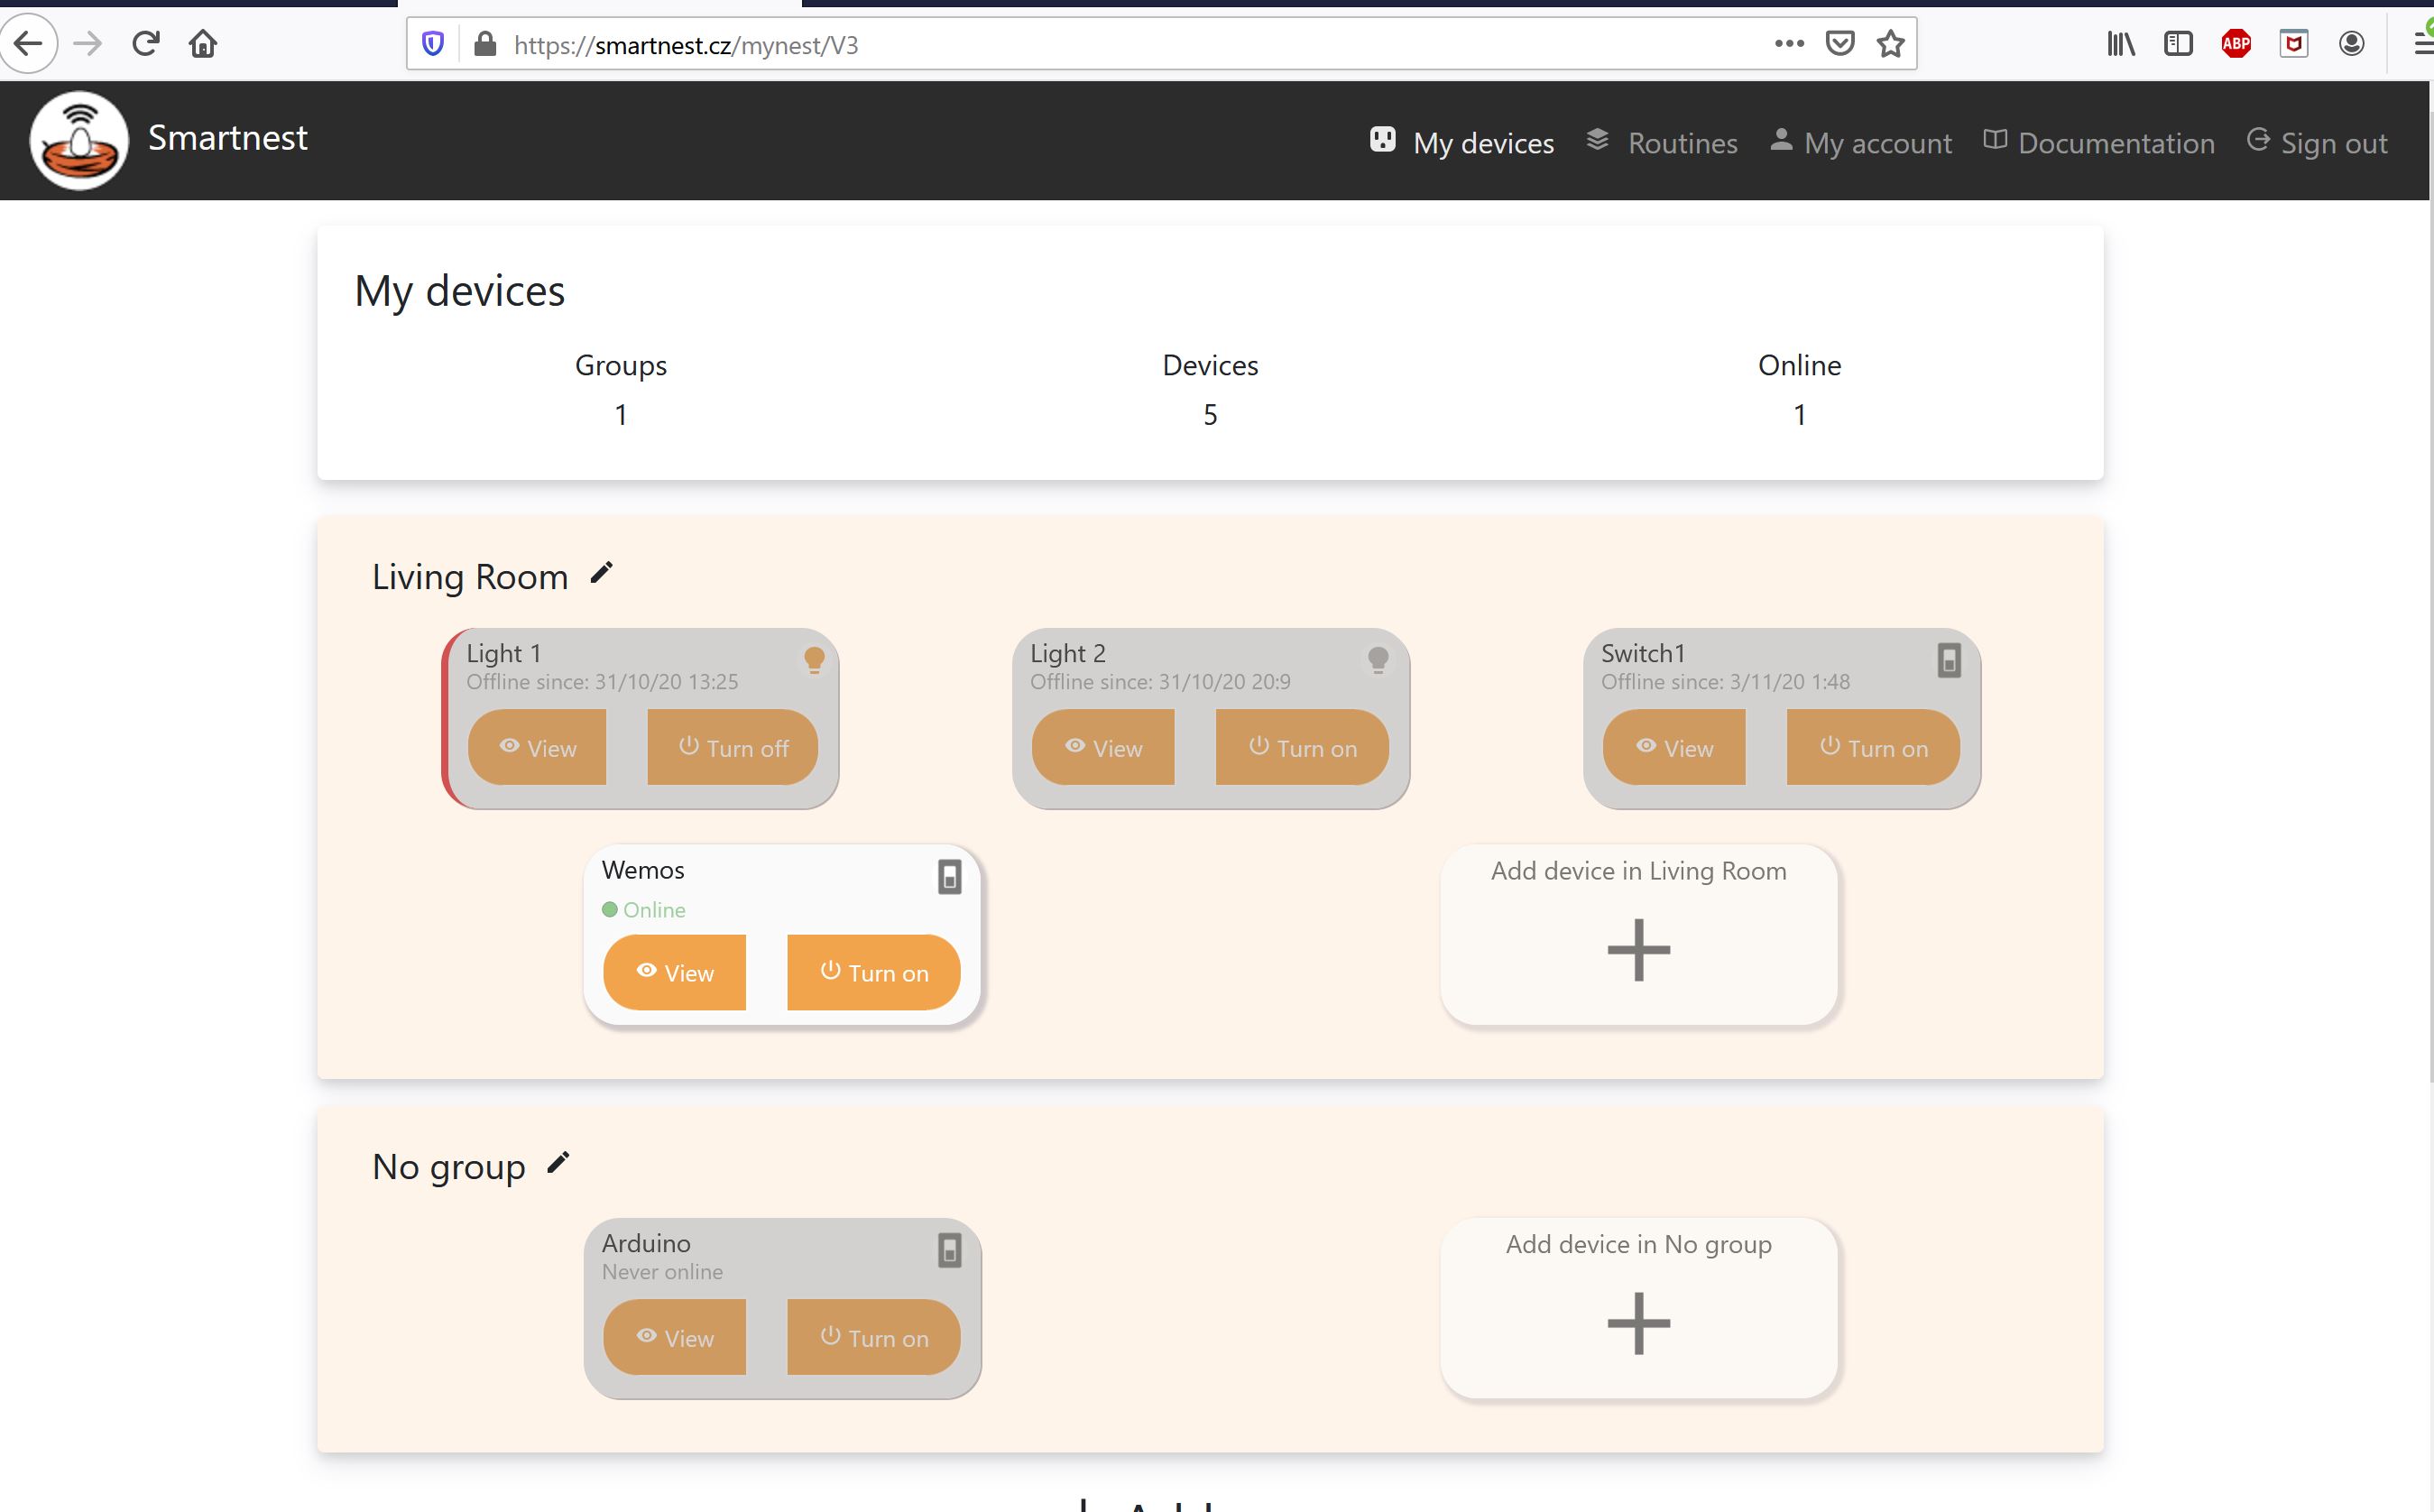
On your smartnest account go to My devices. You should see your device with online status. Click turn on to turn on the device remotely anywhere.
You can also download their app on IOS and Android app market.